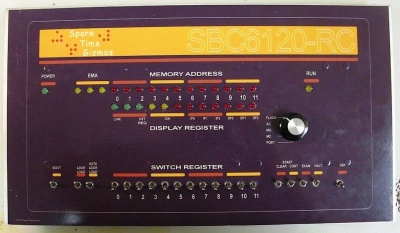
Attaching the Decal
From Spare Time Gizmos' Wiki
(Difference between revisions)
m (Created page with "Faceplate (Brian Lloyd) (Brian Lloyd)]] Attaching the decal to the faceplate can be tricky, but here's one procedure fo...") |
m |
||
| Line 11: | Line 11: | ||
* With the backing sheet still in place, position the decal on the faceplate. Hold the faceplate with the decal up to a strong light so that the light shines through the decal and the holes in the faceplate. Position the decal on the faceplate by aligning the "crosses" on the decal that mark the locations for the LEDs and switches with center of the holes on the faceplate (see attachment decal3). | * With the backing sheet still in place, position the decal on the faceplate. Hold the faceplate with the decal up to a strong light so that the light shines through the decal and the holes in the faceplate. Position the decal on the faceplate by aligning the "crosses" on the decal that mark the locations for the LEDs and switches with center of the holes on the faceplate (see attachment decal3). | ||
| - | + | * Once the decal is in proper position on the faceplate, clamp one half of the decal to the faceplate to prevent movement of the decal (see attachment decal4). | |
* Starting from the center of the decal,remove the backing sheet from the unclamped half of the decal and, starting at the center, adhere that half of the decal to the faceplate smoothing out the decal from the center toward the end (see attachment decal5). | * Starting from the center of the decal,remove the backing sheet from the unclamped half of the decal and, starting at the center, adhere that half of the decal to the faceplate smoothing out the decal from the center toward the end (see attachment decal5). | ||
Revision as of 01:18, 19 December 2012
(Brian Lloyd)]]
Attaching the decal to the faceplate can be tricky, but here's one procedure for doing it, courtesy of Jim Loos.
- Separate the backing sheet from the decal near the center in order to insert a scissors between the backing sheet and the decal (see attachment decal1).
- With a scissors, cut the backing sheet into two halves being careful not to cut the decal (see attachment decal2).
- With the backing sheet still in place, position the decal on the faceplate. Hold the faceplate with the decal up to a strong light so that the light shines through the decal and the holes in the faceplate. Position the decal on the faceplate by aligning the "crosses" on the decal that mark the locations for the LEDs and switches with center of the holes on the faceplate (see attachment decal3).
- Once the decal is in proper position on the faceplate, clamp one half of the decal to the faceplate to prevent movement of the decal (see attachment decal4).
- Starting from the center of the decal,remove the backing sheet from the unclamped half of the decal and, starting at the center, adhere that half of the decal to the faceplate smoothing out the decal from the center toward the end (see attachment decal5).
- Again starting from the center of the decal, remove the remaining half of the backing sheet and adhere the remaining half of the decal to the faceplate smoothing out the decal from the center toward the end (see decal6).
- Using the holes in the faceplate as a guide, cut the holes for the LEDs and switches in the decal (see attachment decal7). Note: use an Xacto knife with a new blade!.
When you have finished this section, proceed to Final Assembly and Checkout.
